If your Yamaha outboard motor stopped working, you may not know the cause or how to start troubleshooting. Fortunately, Yamaha outboard motor problems are usually due to one of several common issues and may not require a mechanic. In this Yamaha outboard troubleshooting guide, we’ll discuss how to troubleshoot a Yamaha outboard motor that stopped running.
How Do You Troubleshoot a Yamaha Outboard Motor?
First, check for the simplest potential issues.
- Is there gas in the tank?
- Is the tank vent open?
- Is the kill switch properly attached?
- Is the gear shift in the neutral position?
- Does the propeller have any debris wrapped about it, or damage?
Try to start the engine both with and without using the choke. If this doesn’t work, try altering the throttle position. Finally, squeeze the primer bulb a few times to make sure the engine is primed up.
Reasons Your Yamaha Outboard Still Isn’t Working
Ok, so you’ve tried the quick solutions, but you still haven’t figured out why your Yamaha outboard motor stopped working. The next step is to do a thorough once-over of each system/engine part until the mystery is solved.
Propeller
If your engine is vibrating excessively, it may be indicative of propeller problems. You should have already checked the propeller for damage and debris, but it’s possible something else has gone wrong. If you’re still unable to start your outboard motor, check the propeller shaft for damage or cracks– these may not be immediately apparent, but could indicate a need for replacement. Next, use a wrench to tighten the steering pivot and mounting bolt if either is loose.
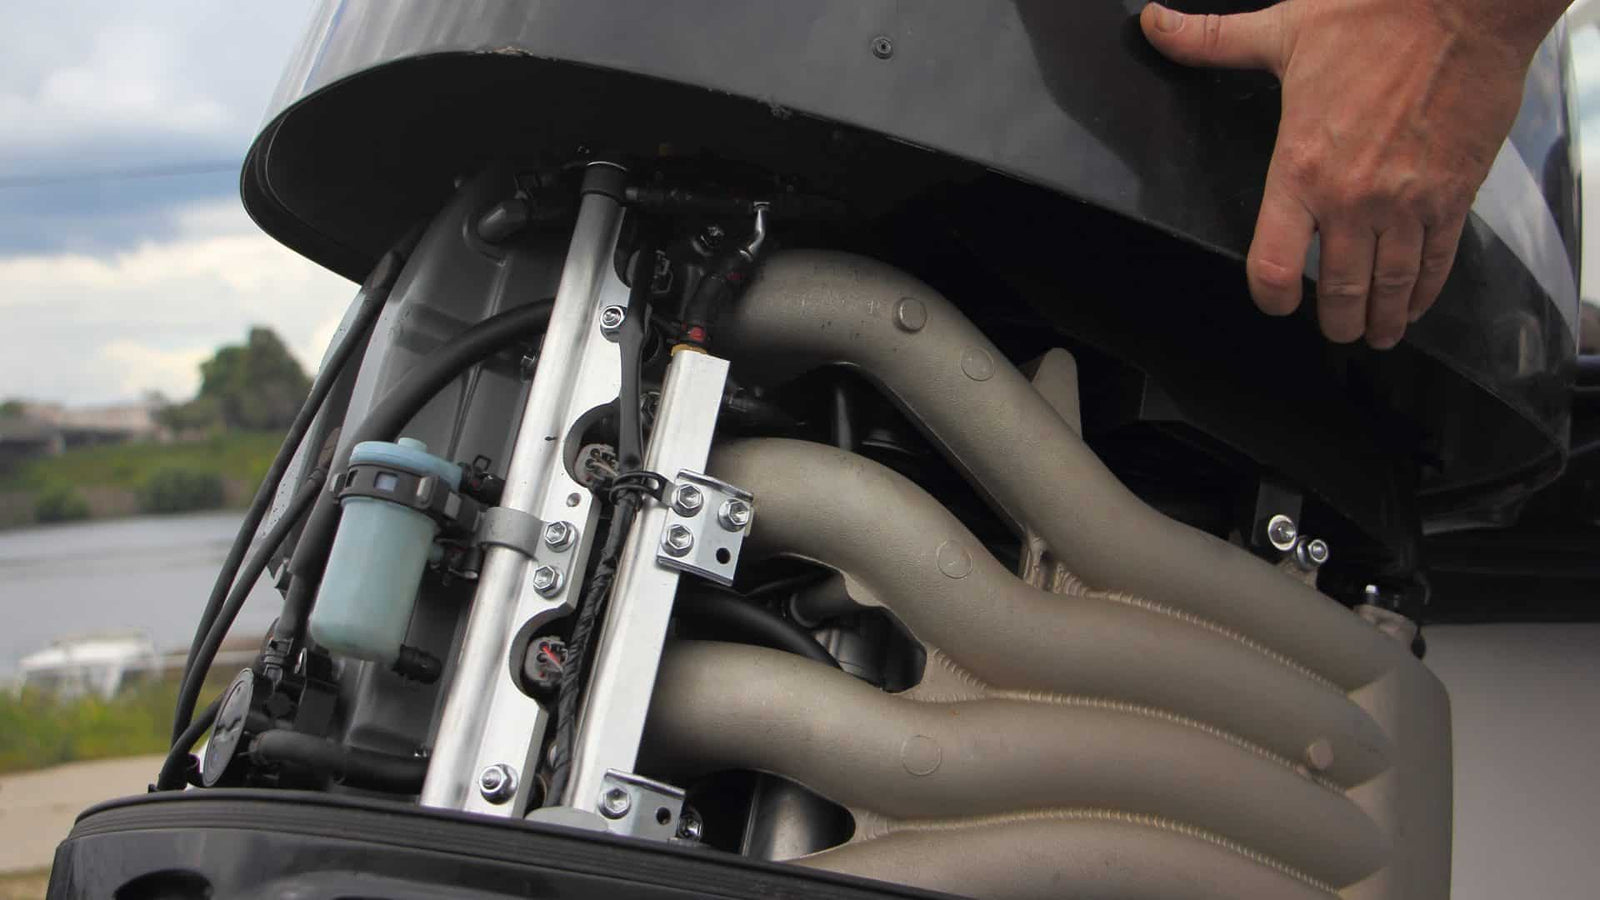
Fuel System
The fuel system is composed of the fuel pump, fuel filter, check valves, fuel hoses, fuel pump diaphragm, and injectors. Listen for the operation sound. If you can’t hear the system attempting to work, check for continuity between the fuse holder, fuse, fuel pump relay, and wiring harness. Repair or replace the defective part(s) if there is no continuity. If there is continuity, replace the electrical fuel pump. If you hear the operation sound, check each part of the fuel system individually.
First, inspect the fuel filters and look for clogs, cracks, kinks, or leaks in the hoses. Replace any parts with damage. Next, check the diaphragm for cracks or other signs of damage. Then, check the vapor separator needle valve for bends or signs of wear. The next step is to check the injectors for clogs and resistance. Then, check for poor connections.
Finally, note if there is any water in the fuel. Ethanol gasoline attracts water, which negatively impacts the combustibility of the fuel. This is especially likely if you haven’t used fuel additives or stabilizers. Water in the fuel may also cause a bad or failing fuel pump. If you find water in your fuel, you may want to check that the pump is in good condition.
You can perform a Yamaha outboard fuel pump test by removing the spark plug wire boot from the spark plug and then removing the spark plug with a plug socket and wrench. Attach a compression gauge into the spark plug socket. If you have an electric motor, you may need a second person to crank your engine over while you twist your throttle position open. Otherwise, you can push the throttle open with one hand and pull the rope start.
What are the Symptoms of a Bad Fuel Pump on an Outboard Motor?
The earliest sign of damage is rapid fuel use. You also may have experienced a bumpy ride or issues with acceleration before getting to this point. If you’ve experienced these problems, you can reference PartsVu’s guide to diagnosing (and preventing!) a bad fuel pump to determine your next steps.
If at any point in this process you discover a part that has cracked, clogged, or shown other signs of wear, it’s most likely preventing your engine from starting. Consult a repair manual for your engine model and year to determine the proper replacement part.
Ignition System
The ignition system is responsible for firing up the engine and keeping it running. Because checking this system may involve sparks and heat, keep flammable liquids away.
The first part of the ignition system to check is the spark plugs. Clean and adjust the spark plugs– they may need to be replaced.
Check the ignition spark with a spark gap tester. If you’ve got a good spark, make sure that the air gap is within specification. Adjust it if needed. If you have a good spark and the gap is within specification, the problem will likely not be found in the ignition system.
However, if you don’t have a good spark, salt buildup on the spark plug caps or ignition coil leads could be causing problems. You’ll also need to check both the spark plug caps and ignition coil leads for proper resistance. Replace degraded parts. When there is no salt buildup and both parts have proper resistance, check the ECM output peak voltage.
If your spark plugs don’t seem to be the issue, check that the electric oil pump and oil level sensor are in good condition. If so, check the reed valve for its condition.
Starting System
If you hear a clicking sound when you attempt to crank the engine, the starter solenoid may be to blame. Depending on the model, you may be able to replace only the solenoid, or you may have to replace the entire self-contained system.
If the start motor isn’t starting at all, you likely have an electrical issue on your hands. Disconnect the black (negative) cable, followed by the red (positive). You’ll then need to remove the battery from its housing. If the battery is damaged, replace it. However, some signs of wear may be fixed.
Corrosion can be scrubbed away with a wire-bristle brush. Any other buildup or residue can be removed with a mixture of water and baking soda at a ratio of 1 cup:1 tablespoon, respectively. If you use this mixture, be sure to thoroughly dry the battery immediately after. Finally, charge the battery and clean the connections. Then, reconnect the positive cable, followed by the negative. Use dielectric grease when reinstalling the connections.
If all is well with the battery, you’ll need to check if a fuse has blown. To check if a fuse has blown, use a screwdriver to remove the electrical cover of the motor. With pliers, carefully remove the fuse holder. If the center is broken, that means it’s blown. You’ll have to check the Yamaha outboard repair manual to determine the correct amperage needed to replace it. If none of this works, continue onto the other systems until the issue is resolved.
What is the Life Expectancy of a Yamaha Outboard?
Yamaha outboard engines have a strong reputation for reliability, and for good reason. Your outboard engine life expectancy, at minimum, is about 1,500 hours (or, 6-8 years for the average boater). However, a properly maintained outboard engine can last more than 4,000 hours! This means that your engine could last for 16-21 years before needing to be replaced.
This guide to troubleshooting why your Yamaha outboard motor stopped working addresses issues common to the majority of Yamaha outboard models. We recommend that you locate or download the repair manual for your specific engine for more information, and consult a certified mechanic over any uncertainties.
14 comments
Red light oil is full
———
Yamaha Outboard Maintenance replied:
Hi Richard, thanks for reaching out. If your red oil light is on even though the oil reservoir is full, it could be due to a faulty sensor, wiring issue, or a restriction in the oil delivery system. Since we aren’t mechanics, we recommend having the motor inspected by a qualified technician to ensure proper diagnosis and avoid any risk of engine damage. If you’d like, you can also double-check the connections and sensor inside the oil tank for any corrosion or loose wiring. Best Regards Markine
I have a Yamaha 150 hp outboard
the clamp holding the corrugated cable cover will not hold attachment at the motor. it has to be reattached each time I take the boat out.
Is there an alternative clamp or alternative cover that will not require constant attention?
———
Yamaha Outboard Maintenance replied:
Hi John,
Thanks for reaching out. The corrugated rigging tube at the motor connection is a common wear point, and the factory clamp can sometimes lose its grip over time. Unfortunately, there isn’t a different Yamaha OEM clamp or tube design available as a direct alternative. What many boaters do instead is:
Replace the clamp with a stainless steel hose clamp for a stronger, longer-lasting hold. * Add a rigging tube adapter kit (aftermarket options are available) that provides a more secure, sealed connection at the motor. * If the corrugated cover itself is worn or stretched, replacing the tube can also help it stay secured better. We’re not mechanics, so if you’re not comfortable looking into this yourself, we do recommend having a qualified Yamaha technician look the motor over to ensure everything is properly secured and working as it should.Best regards, Markine
I have a 2012 Yamaha HPDI (Z200TXR) 2 stroke. When the engine is running and in neutral, the beeping alarm comes on. If I put the engine in gear or turn it off, the alarm stops. It doesn’t do it every time, but does come on frequently. I have emptied my external fuel/water separating filter, and the one on the motor several times. I don’t see any water in the fuel and the float is in the down position. I have also unplugged the sensor on the fuel filter cup (the sensor for water in fuel) and the alarm still comes on. Any ideas on troubleshooting what the problem could be? My dealer is booked for the next three weeks so I was hoping to try and troubleshoot on my own. Thanks for your help
———
Yamaha Outboard Maintenance replied:
Hi Scott,
Thanks for reaching out — that’s definitely a frustrating issue. Based on what you’ve described with your 2012 Yamaha HPDI (Z200TXR), here are a few possibilities you might want to explore while waiting for your dealer:
Potential Causes to Check:
1. Neutral Position Sensor (NPS): Since the alarm only triggers in neutral, the neutral position switch could be faulty or misaligned, causing an incorrect signal to the ECM. 2. Oil System Sensors: Double-check the engine oil tank sensor and remote oil tank for proper operation and wiring. A low oil level or faulty sensor can intermittently trip the alarm. 3. Overheat Warning: If the thermostats or temperature sensors are beginning to fail, it could cause false alarms when idling (in neutral). See if there’s any blockage in the cooling system or signs of poor water flow. 4. Battery Voltage: Low or unstable voltage at idle could potentially cause the alarm to trigger. Make sure your battery and charging system are healthy. 5. Fault Codes: Some alarms are logged in the ECM. If you have access to a Yamaha Diagnostic System (YDS) or a dealer later, they can pull stored fault codes to pinpoint the issue.Important Note: While we’re happy to share common troubleshooting suggestions, we’re not certified mechanics, and in some cases, a full diagnostic scan by a qualified Yamaha technician may be the safest route — especially with intermittent electronic issues. If you’re comfortable doing some basic checks in the meantime, these areas could be a good place to start. And feel free to reach back out if you find anything new — we’re happy to help however we can!
Best Regards Markine
Thanks for the detailed write-up, MacC. Based on your symptoms and findings, it sounds like your 2020 70hp outboard is fuel diluting the oil (a.k.a. “making oil”), which is a serious condition that can quickly degrade lubrication and damage the engine. Here’s a pecking order for troubleshooting the root causes of fuel dilution, especially since you’ve already addressed some fuel delivery problems.
Pecking Order of Probable Causes & Checks 1. Leaking Fuel Injector(s) or Faulty Injector Driver (for EFI models)
Why: If an injector leaks or over-fuels, it can dump unburnt fuel into the cylinder, which then washes down into the crankcase. * Check: * Remove and inspect spark plugs — look for signs of wetness or a strong fuel smell. * Have injectors tested for leak-down and spray pattern. * If possible, test fuel pressure regulator — excessive pressure can cause over-fueling. 2. Stuck Open Thermostat (engine not reaching operating temp) Why: If the engine is running too cold, it won’t vaporize fuel properly, leading to poor combustion and fuel washing into the crankcase. * Check: * Monitor engine temp with IR gun or diagnostic software. * Replace thermostat if it’s stuck open or sluggish. 3. Short-Running Cycles or Excessive Idling Why: Incomplete warm-up cycles cause excess fuel to collect in oil, especially if run time is short and oil doesn’t get hot enough to evaporate fuel. * Check: Try running engine longer/harder after oil change. Monitor if the issue worsens or stabilizes. 4. Fuel Pump Diaphragm Leak (especially on older or VRO-style systems) Why: A ruptured fuel pump diaphragm can leak raw fuel directly into the crankcase via vacuum line or pulse port. * Check: * If your model has a mechanical diaphragm pump, check for fuel in the vacuum hose or crankcase side. * Replace or rebuild pump if leaking. 5. Blow-by or Excessive Cylinder Wear Why: Worn rings or cylinders allow unburnt fuel-air mixture to bypass into the crankcase. * Check: * Perform a compression test or leak-down test. * If compression is low, inspect cylinders with a borescope. 6. Faulty ECU Sensor Data (e.g., coolant temp, MAP) Why: Bad sensor inputs can cause the ECU to over-fuel thinking engine is cold. * Check: * Use diagnostic software or bring to dealer for computer scan. * Look for fuel trims or unusual sensor readings.Next Steps (suggested sequence):
1. Change oil again (document quantity/fuel smell). 2. Pull spark plugs — check for wetness/gas smell (helps isolate cylinder). 3. Check thermostat & engine temp. 4. Test fuel injectors and pump pressure. 5. Check fuel pump diaphragm (if applicable). 6. Run engine longer/harder to verify if dilution happens only with short cycles. 7. Compression or leak-down test if above checks out.Tip for Oil Check: Try this after you change oil:
Run motor at operating temp for 15–20 minutes at varying throttle. * Let it sit 10 minutes. * Check oil level and smell. If it’s up again and smells like gas — you have active fuel dilution.Once basic troubleshooting is done, it’s strongly recommended to have a licensed marine mechanic inspect:
Fuel injectors and pump system * Engine temp sensors and ECU input readings * Overall engine health (compression, diagnostics) They can use specialized tools (e.g. ECU diagnostic software, pressure/vacuum gauges, injector testing benches) to pinpoint the root cause quickly and accurately, preventing permanent engine damage.Hi Drew,
Thanks for sharing the details. Based on your description — 2020 F70 with 500 hours that runs great when cold but loses power to around 3900 RPM WOT after 15–30 minutes, followed by shaking on restart — this sounds like a heat-related performance issue, and you’re right to investigate it now before it worsens. 🔧 Possible Causes to Consider: 1. Fuel Delivery Problem (Vapor Lock or Weak Lift Pump)
As the engine warms up, heat can cause vapor lock or expose a weak fuel lift pump. * Also check for soft fuel lines, a collapsing primer bulb, or partially blocked fuel filters. 2. Clogged VST (Vapor Separator Tank) Filter A partially clogged VST filter can allow the engine to run fine when cold, but starve fuel at higher RPMs once warm. 3. Ignition Coil or Injector Breakdown Failing ignition coils or fuel injectors may perform fine cold, then break down under heat, causing rough running and power loss. 4. Overheat or Guardian Mode If the engine begins to overheat, the ECM (engine computer) may reduce RPM to prevent damage. * Check your water pump impeller, thermostat, and cooling passages.Suggested Next Steps: Since you’re not a mechanic (and many of these issues require engine-specific tools or diagnostics), I recommend having a certified Yamaha marine technician:
Run a diagnostic scan to check for any stored fault codes. * Test the ignition system and fuel pressures, especially under load and once the engine is warm. * Inspect or replace the VST filter and fuel components if needed.Even if the engine is still starting and idling fine, these symptoms point to something that can worsen quickly or lead to long-term damage if left unchecked. Best Regards
Markine