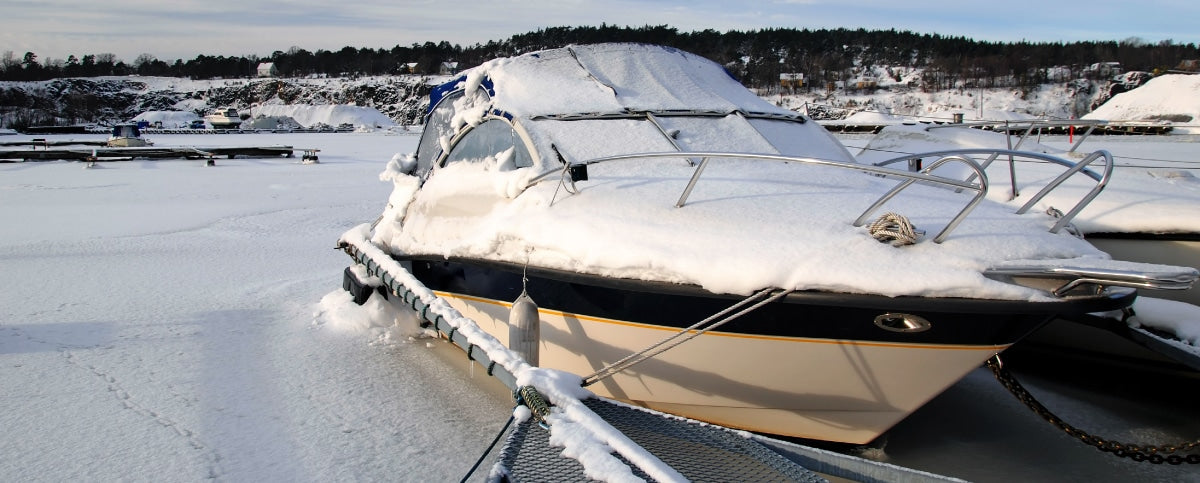
Once again, the season has arrived when it’s necessary to store your boat. While it’s always a bit more fun to pull out your boat than to put it away, ensuring the proper winterization of your Yamaha outboard engine is essential to prevent damage and ensure a smooth start to the next season.
There are several things you can do before storing your boat to get a jump on next season—like changing your oil, changing your Yamaha fuel-water separating filter, and maybe touching up some scratches on your cowling cover. In fact, there are six highly recommended steps.
- Thoroughly flush your engine
- Stabilize your fuel system
- Fog your outboard engine
- Change your spark plugs
- Change lower unit oil
- Disconnect your battery
Step 1: Flush Your Engine
What You’ll Need:
- Motor flusher
- Garden hose
- Water supply
What You’ll Do:
The first step to winterizing an outboard motor is to flush your engine. For saltwater boaters, it’s crucial to diligently flush your engine to eliminate any salt deposits. Freshwater boaters should focus on clearing away general mud and dirt. Neglecting this cleaning process can result in engine corrosion. In particular, saltwater boaters should be aware that salt crystals within the lower unit can lead to substantial damage.
If your outboard has a hose adapter, simply screw the hose into the port, turn on the water and let the water run for about 5 minutes.
Next, remove the cowling cover and look for any salt or grime build-up that may have settled outside any engine components. If you spot any build-up, simply rinse it away.
Finally, tilt the engine all the way up, then trim it all of the way down to make sure every drop of water drains from the engine.
Caution: Do not run the engine when flushing while using a hose port. This method is solely designed for flushing while your engine is entirely off.
Flushing Your Outboard with the Engine Running
To flush your Yamaha outboard with the engine running, you’ll require a motor flusher, sometimes referred to as earmuffs. Attach your garden hose securely to the motor flusher, then position the motor flusher onto the engine’s water intakes. It’s important to confirm that the earmuffs are fully encasing the water intakes. Using this flushing method, you will turn on the engine. But first, make sure that you have a good water supply and that water is coming out on both sides of the earmuffs.
Start the engine and make sure that water is flowing from the tell tale. Assure that your engine is not overheating by holding your hand under the tell tale water stream. It should not be uncomfortable to hold your hand in the stream of water. If the water is excessively hot, water is not flowing correctly, and you are overheating your engine—turn off the engine, reposition the earmuffs, and start again.
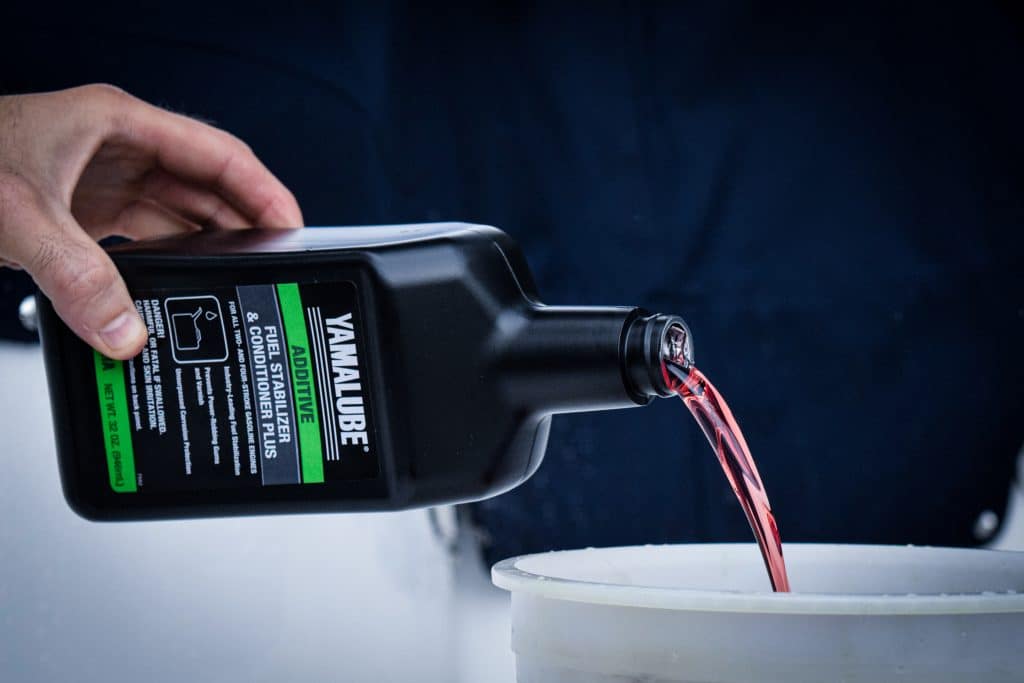
Step 2: Stabilize Your Fuel System
What You'll Need:
- Fuel stabilizer suitable for long term storage
- Motor flusher
- Garden hose
- Water supply
What You'll Do:
Because it is so common, many of us use ethanol-enriched gasoline much of the time. We recommend using a fuel stabilizer all of the time when running ethanol-enriched gasoline. Read PartsVu’s Ethanol Gasoline In Outboard Engines article to learn why. Additionally, it is vital to use a fuel stabilizer like Yamaha Fuel Stabilizer and Conditioner Plus when your boat will be sitting unused for any more than two or three months.
Add the amount of fuel stabilizer directed on the product’s packing to your fuel—for instance, 1 ounce of Yamaha Fuel Stabilizer and Conditioner Plus for every gallon of gasoline, assuming the engine will be stored for more than 2 months. If you are storing the engine for 2 months or less, the suggested ratio from Yamaha is 1 ounce of stabilizer for every 3 gallons of gasoline.
Run the engine with stabilized fuel for 10-15 minutes to thoroughly circulate the stabilized fuel throughout your fuel system. If your boat is out of the water, follow the Flush Your Outboard with the Engine Running procedures detailed above.
Steps 3 & 4: Fog Your Engine and Change Your Spark Plugs
What You'll Need:
- Fogging oil
- Crescent wrench
- Replacement spark plugs
- Motor flusher
- Garden hose
- Water supply
What You'll Do:
So, what is fogging oil or fogging fluid anyway? Yamalube fogging oil is a wax-based oil that coats the engine and prevents corrosion. As you work through this process, you will soon understand why this process is called fogging the engine as there will be plenty of white smoke.
Since you will not be in the water while performing this task, you will need to use a motor flusher to keep the engine cool while you complete the fogging process. Follow the Flush Your Outboard with the Engine Running procedures detailed above.
If applicable, remove your engine’s air cleaner to get to the carburetors or cylinder air intakes. Rev the engine to a bit above idle, and with the engine running, spray the fogging oil into the carburetor(s) or air intake of each cylinder.
Continuously spray fogging oil into your engine’s carburetors or cylinder air intakes until the engine stalls. Be sure to spray a coating of fogging oil into each cylinder or carburetor. Don’t spray too much oil at once and kill the engine immediately, but after a continuous spray, the engine will eventually stall. This is precisely what you want, and the ultimate stalling indicates that the engine is thoroughly covered with fogging oil.
Next, use your crescent wrench to remove the spark plugs and spray fogging oil into each cylinder. Turn the flywheel to move the cylinders allowing you to coat the entire cylinder wall. Rather than turning the flywheel to move the cylinders, you can also simply start the engine for just a few seconds to allow the fogging oil to coat the cylinder walls–repeat this process a couple of times for good measure. Replace old spark plugs with new spark plugs so that you are ready to go in the spring.

Step 5: Change Lower Unit Oil
What You'll Need:
- Sufficient quantity of lower unit oil / gear lube oil
- Gear lube/oil pump
- 2 new drain screw gaskets
- Drain pan
- Large flat head screwdriver
- A few rags
What You'll Do:
We strongly recommend changing your Yamaha gear lube before storage to make sure that there is no water in the lower unit’s oil. Any water in the oil could freeze, expand, and crack your lower unit. Also, changing lower unit oil means one less thing to do at the beginning of next season.
First, you’ll need to know how much lower unit oil / gear lube you need to have on hand. Check your owner’s manual or find your engine model within our Yamaha Specs & Capacities Chart.
Locate the lower and upper lower unit oil drain holes. With your drain pan in position, first, remove the lower drain screw. The oil will start to drip out into the drain pan.
Next, remove the upper drain screw—oil will drain out quickly. Allow the oil to drain completely.
It is essential that you pay close attention to your lower unit’s oil. If the oil is a milky color, there is water in the lower unit, and you will have significant problems down the road. If this is the case, go directly to your marine mechanic to diagnose the problem and hopefully fix the issue before it causes more damage.
With the oil completely drained, screw in your pump fitting and attach the pump. Remove the cap of your bottle of lower unit oil and screw the pump onto the bottle.
Pump until oil begins flowing out of the upper drain hole.
Install a new lower unit drain gasket onto your upper screw plug. Insert the upper screw plug, hand tighten, then tighten securely with your flathead screwdriver.
Install a new lower unit drain gasket on your lower screw. With the lower screw in your hand, remove the gear oil pump fitting. Quickly insert and tighten the lower screw.
Wipe everything down and properly dispose of your old lower unit oil.
Caution: There must be no water in your lower unit oil. If there is water in the lower unit oil and your boat is stored in the cold, the water in the oil will freeze and crack your lower unit, which is definitely a bad thing.
Step 6: Disconnect Your Battery
What You'll Need:
- Battery terminal cleaner and protector
What You'll Do:
Disconnect your battery and spray Yamaha Battery Terminal Protector & Cleaner on your battery terminals.
And that’s it! Winterizing an outboard motor is a critical boat maintenance step for those of us who live in climates that experience cold weather. Proper Yamaha maintenance requires genuine Yamaha outboard parts and products— and Yamaha Outboard Maintenance is here to help.